Friday, September 25, 2015

For the Birds!

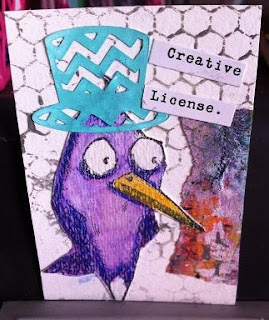
I was RAK'ed stamped images of Bird crazy from Tim Holts. they were on Water Color paper. Last night I colored them using Neo Color 2's and Prisma color penciled. I then Made Atc's with them While I had the stack of starters on my desk.


The background on this one is a napkin and a flower magazine image.I used pop dots to attach him t the ATC.

This one and the one below are from a journal page I did in art journal class last month, after I cut it down to size to fit in my journal. Used a stencil and Brushed Pewter Distress crackle paint. The hat he is wearing is a Silhouette file.

He's wearing another hat from that same file. 


These last 2 are also a off cute from a journal page I did from art journal class from earlier this month. This little guy I gave him a coffee to go cup that i cut on my Cameo from the Silhouette store. 

 I painted his hat with craft paint. He's the only one that I glued right on to the ATC.


ATC's galore!

I had a stack of ATC starters. They were starting to mount up so I took some of them and finished them. None of them took very long to do.


This Started was book text and a stencil with black craft paint. (similar to the ATC I did for a VLVS! challenge last month.) I did add some drips with Glimmer Glam in Be Positive by Tater Angels. I added a wood veneer bat that I painted black and a magazine image and added a crown. The stickers are from Tim Holtz Chit chat Holiday stickers.


This started was a from A journal page I did in art Journal class back in Sept. The paint For the background is from Dina Wakley. The only thing I added to this ATC was Distress Crackle paint in Picket Fence through a Stencil. I learned this technique from watching Aaron of Imperfect Impulses. Love it. I added a Tiny Text Sticker from Cosmo Cricket.


This one I did the background a long time ago. I Think its Lindy's stamp Gang Sprays. Don't ask me what color, I don't remember. lol The image is from Life Magazine book. There was a little boy uin the picture, but I think he got cold feet and left. lol The sentiment is from Dylusions.


Finally This started is on photo paper and alcohol inks. Another magazine image that was on my desk. The crown is from Maya Road and the sentiment is another Tiny Text by Cosmo Cricket 

Friday, September 18, 2015

King of Hearts

Over on the Viva Las VegaStamps! groupies Facebook group there was another swap. This was an ATC swap where the theme was Roalty. I had to make 4 ATC's We get 3 in return and 1 is for the store. The cards had to have a King, Queen, Jack and Ace , what you find in a deck of cards.


One day while it wasn't too hot out I went out on back porch and did some nail polish marble backgrounds. I did them with different type of card stock than the last time I did them. I also used 4 different nail polishes by LA Colors that I had gotten from Dollar Tree. I had precut some atc size cards that were Kraft card stock. I really liked how the marbling looked on them so that's what I used for my bases for the swap. The one thing I learned from this round of marbling that the LA Colors polishes from Dollar Tree were not staying on the papers like the Sinful Color brand does. Some of it flaked off Some bubbled. and when I stamped with the StarzOn ink pad like I did with the postcards I did back in April, a little of the polish was coming off on to the stamp. :(  I stamped the little scribble heart for the Card suite and wrote inside the J,Q, K, and A inside of the heart. I also added a sticker sentiment from Cosmo Cricket Tiny text stickers.


The Jack is Wheeley Frog Stamped on white card stock with Black archival ink pad. Colored with Prismas. I added a crown charm from my stash. 


Ace is the Fish with high heels and Fish standing on a box. Added some bling from Jolies for bubbles.

The Queen and King are my favorites! The Queen is  Lady Silhouette (AKA Marylin M.) I added a crown chipboard from Maya Road. Painted it with Bubble gum pink Dylusions paint. Stamped the all day sucker stamp on top once the paint was dry. Glued it with Aleen's Tacky.


Last but least the King! I originally wanted to have Elvis, but he was too big for an ATC. So I settled with Frankie. LOL His crown is painted with Vibrant Turquoise.  I stamped his crown with Number strip.


Sunday, September 13, 2015

New Facebook group for Anything but a card!

Greetings friends! Even though the challenges here on the blog have been put to rest {so to speak}... the creative minds of Anything but a Card Challenges are moving our worldwide community of like creators to a new environment on Facebook. The online world is moving so fast and is ever changing and we want to grow this community we have nurtured here with all of you and have more interactive engagement. We are still all about anything and everything except cards... and carving out that piece of Cre8time to make your heart and muse happy.

So we invite all of YOU, our loyal followers, challenge participants, readers, and everyone to join us in our new Facebook Group "Anything but a Card CREATIONS".

This is just the beginning... so CLICK HERE, drop by and join us! Please share on your blog and spread the word!! Join up, introduce yourself and share one photo of what you are currently working on... I look forward to getting to know you all better!

Sheri

Monday, September 7, 2015

All Hallows Eve

New Challenge over on Viva Las VegaStamps! blog. The inspiration board for the challenge had all kinds of good things to be inspired from drips, spots, Halloween, skeletons, etc.

I did a 5x7 flat board canvas that I picked up a couple years ago at Ross.


I glued sown some dollies with Mod Podg for texture. Then I gesseoed over it. Next I did a layer of craft paint, Lemonade by Americana. I then dripped some water down  craft paint Parakeet by Apple Barrel. 

I then splatter some Tatter Angels Glimmer Glam in Be Positive, then poured some in a pallet, watered i  down a bit and made some drips with that,

 While that was drying I stamped the All day sucker and the Skeleton family on white card stock with Black Archival ink pad. I colored the sucker with the Be Positive Glimmer Glam.  When that dried I cut that out and fussy cut the Skeleton family out. I was so proud of my self that I din't cut anything off the family! LOL I glued the sucker to the adult skelly. Then I used Crackle Accents to glue it to the canvas. 

I stamped on to the canvas the spiked fence with the Archival ink pad and also the flock of bats on the canvas too.  I stamped All Hollows Eve. I cut the words out, I deiced to spray the words with Cut grass Dylusions spray. I didn't like the white cardstock on the canvas.  Glued that on with the Crackle accents(my Glossy accents ran out and I have 2 bottles of the Crackle) Then  I used the Crackle accents on the words themselfs. I have no idea why, but the Crackle Accents seems harder to get out of the bottle then the glossy accents. I had such a cramp in my hand after. lol I remembered why I hardly use the crackle. lol


Saturday, September 5, 2015

Altered box using DecoArt products

So Early this year I went to Goodwill and picked up this Armoire box. I thought It would be a good project to alter. I made those Doll cases for my cousins, and I had been wanting to make one for myself after the move, but never got around to it. When I saw this box at Goodwill thats what I thought of. So I began gathering stuff for it. I got little hangers from Joann's/ I was going to do this projecrt for a future Anything But A Card Challenge Blog. But ABAC is no more sadly.

If you saw my last Youtube Video, you saw the goodies I got from DecoArt via their Blogger program. I signed up late last year and didn't hear if I got accepted or not. Then a few weeks ago, I thought I try again. Then I realized I did get accepted. I sent them the project I wanted to do with their products Then I picked what Deco Art Products I would like to use for the project. As you can tell my project got the okay. so I started working on it yesterday and today.

Here are before pictures of the box. I started to work on it, then remembered to take a before picture. Thankfully i didn't get to far. :) And I took pictures after Every step I did (Go ME! ) so this post will be picture heavy. :D

Inside the box

 First think I did i took some pattern tissue paper crumpled it up and then Mod Podge it to the outside of the box for some texture. I did not do the inside.


I then used DecoArt  Media White Gesso for the outside of the box.

After that dried, I used the DecoArt Media Black Gesso on the inside the box and inside the door.

Next, for more texture, I used the Scribbles Stencil by Americana With DecoArt Media  White Modeling Paste on the sides and top of the box.

For the from door and the back  used the Bon Voyage stencil by Americana . Also using the white Molding paste.


I used Americana craft paint Peony Pink for the sides of the box. I did have do do a couple coats, to make sure everything was covered. I even used my fingers to get where the paintbrush couldn't.

The back and the door I used Carousel Pink. Again I did a couple coats and used my fingers.


The inside the door I used the DecoArt Media Black Molding Paste and the Scribble stencil. Leaving it as is. I'm sure I will add something to the back of the door. maybe a "mirror" or something.


Back to the outside.  I put a little dab of Americana craft paint in Lamp (Ebony)Black on a plastic lid and sprayed some water. Itook a paint brush and did splots and splatters on all sides of the outside of the box. I had splots everywhere! My desk, things on my desk, my arms, my face, my glasses! Looks cool, though I don't like the dripage that happened on the front door, LOL 


Finally I sprayed DecoArt Media Shimmer Mist in white. I spayed far up and I did while it back, I wanted the shimmer.


I started working on the inside. I cut a shelf out of scrapbook paper and then punched holes on both sides of the folds where I scored it. I ran wire through the hole as the rod to hang the hangers. but it sagged when I put them on. I also had a heck of a time trying to figure out the length and width of the shelf I needed. I was getting totally frusterated that it wasn't working. So I ripped the shelf out and put in the corner for a time out til we are on speaking terms again. So stay tuned!